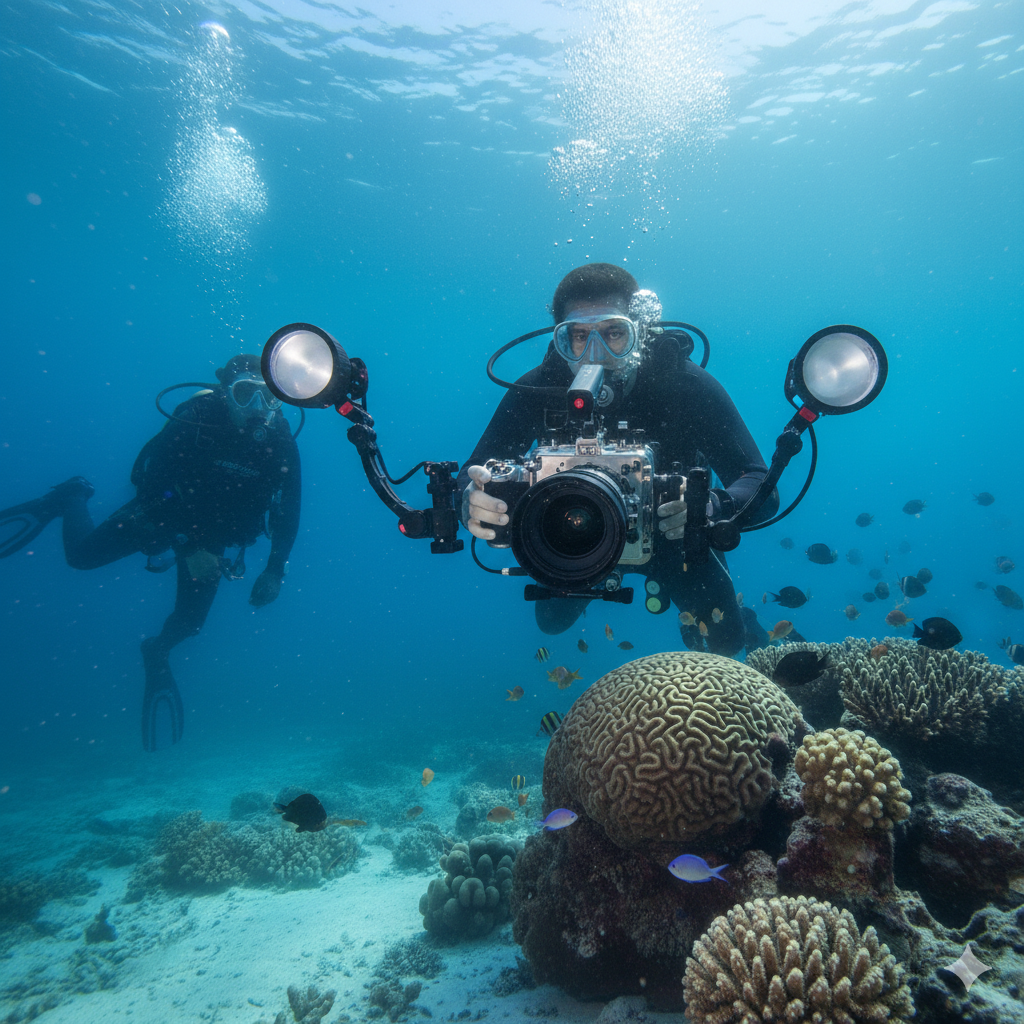
Fluorescence diving has a way of changing how you look at a reef you thought you already understood. Under the right light, corals glow with sharp greens and oranges, sometimes even faint reds that feel almost unreal at first glance. The effect is not magic, and it is definitely not random. It comes down to a careful setup that controls the light hitting the reef and the light reaching your eyes. Once the kit is assembled properly, the difference is obvious within minutes underwater.
Key Insights:
- Blue excitation light activates fluorescent pigments found in many reef organisms.
- Filters matter more than most divers expect, and small alignment issues can dull the effect.
- A stable beam and slow movement reveal far more than powerful but scattered lighting.
- Keeping the setup simple usually leads to better results underwater.
- A quick surface check often saves a frustrating dive.
Step 1: Choose the Right Blue Excitation Light
Start with the light because everything else depends on it. Fluorescence happens when blue wavelength light hits certain pigments in corals and marine life. Those pigments release visible color that your eyes can detect through the correct filter. A strong beam helps, but the real priority is control. A narrow and steady beam lets you examine small sections of reef without flooding the area with unnecessary light. Divers sometimes chase brightness numbers, but in practice, a well-focused beam is far more useful when you are scanning coral branches or rock crevices.
Step 2: Install Mask Filters Properly
The mask filter is where many first-time fluorescence divers make mistakes. Without the filter, most of what you see is blue light bouncing back toward you. The glowing colors remain hidden behind that reflection. The filter blocks the blue reflection so the fluorescence stands out clearly. It should sit flush against the mask and stay aligned while you move your head. Some divers add fluorescent light filter diffuser covers here because the beam becomes slightly softer and easier on the eyes when you are studying reef surfaces closely.
Step 3: Prepare and Align Your Light System
Once the mask is sorted out, attach the excitation filter to the dive light and check the alignment. You want the beam to follow exactly where you are looking. If the beam drifts off center, you will spend half the dive correcting it. Many divers eventually move toward gear built specifically for fluorescence diving. Equipment from Fire Dive Gear is often mentioned among divers who spend a lot of time doing these dives because the filters and lighting systems are designed around this exact use. Good alignment at the start makes the dive feel much more natural.
Step 4: Test Stability and Mounting Before Entering the Water
Before you descend, hold the light in position and move it the way you normally would underwater. The filter should not rotate, and the beam should stay consistent. This step might seem minor, but loose filters become annoying very quickly once you are at depth. If you can, shine the light across a shallow coral or rock surface and confirm that the glow is visible. That quick test tells you the system is working.
Step 5: Use Controlled Lighting Underwater
Be kind to your body and use a little more care than usual when you are below the surface of the water. You may initially see that fluorescence is present in many areas; however, once your eyes adjust, you will see that the fluorescence is clearly visible. Glide your light beam gradually up the face of coral heads and along reef edges. The focused nature of a diving light is great for seeing only the area you want to see, as opposed to seeing the entire area at once. Good buoyancy will assist you here, as you may kick up sand or particulate matter that will scatter the beam and reduce your visibility.
Step 6: Manage Light Reflection and Environmental Conditions
Light control matters more during fluorescence dives than many divers expect. If several beams are moving around the same reef section, the effect becomes harder to see. It helps to coordinate with your dive partner so one person scans while the other observes. Fluorescent light filter diffuser covers can be helpful in areas where sand or pale reef surfaces reflect a lot of light. These covers can help to balance the illumination and ensure that the glow is visible rather than being washed away.
Step 7: Perform a Final Quick Check Before Descending
Right before the dive begins, run through a quick check without rushing it. Make sure the filter is secure, confirm the beam looks clean, and look through your mask filter for a few seconds to confirm visibility feels comfortable. These small checks are easy to skip, but they usually make the dive smoother.
Conclusion
Underwater diving flashlight rewards attention to detail more than expensive gear or complicated setups. When the light, filters, and positioning come together correctly, the reef reveals colors that are easy to miss during regular dives. It is one of those experiences that tends to stick with you long after the dive ends. If you are thinking about trying it, take the time to assemble your kit properly, test it in shallow water, and head out with a setup you trust. Start building your fluorescence diving kit now and see what the reef really looks like after dark.