Wood floor installation is one of the most effective ways to enhance the beauty, value, and comfort of any home or commercial space. Whether you’re renovating an old interior or building a new one, wooden flooring offers timeless appeal, durability, and versatility. However, achieving a flawless finish requires proper planning, the right materials, and expert techniques.
Why Choose Wood Flooring?
Wood flooring remains a popular choice for homeowners due to its natural elegance and long lifespan. Unlike other flooring options, wood can be refinished multiple times, allowing it to maintain its appearance for decades. It also complements various interior styles, from modern minimalism to rustic charm.
Additionally, wood floors are relatively easy to clean and can improve indoor air quality since they don’t trap dust, allergens, or pet dander like carpets do.
Types of Wood Flooring
Before starting a wood floor installation project, it’s important to understand the different types available:
1. Solid Hardwood
Made from a single piece of wood, solid hardwood is known for its durability and authenticity. It can be sanded and refinished several times, making it ideal for long-term use.
2. Engineered Wood
Engineered wood consists of multiple layers, with a real wood veneer on top. It is more resistant to moisture and temperature changes, making it suitable for basements and areas with fluctuating humidity.
3. Laminate Wood Flooring
While not real wood, laminate mimics the appearance of wood at a lower cost. It’s scratch-resistant and easy to install but cannot be refinished.
Preparing for Installation
Proper preparation is key to a successful wood floor installation. Start by measuring the area accurately to determine how much material you’ll need. Always purchase extra flooring (about 10%) to account for waste and mistakes.
Next, ensure the subfloor is clean, dry, and level. Any unevenness can lead to gaps or squeaks in the finished floor. It’s also essential to acclimate the wood by leaving it in the installation area for a few days so it adjusts to the room’s temperature and humidity.
Installation Methods
There are several methods used in wood floor installation, depending on the type of flooring:
Nail-Down Installation
Common for solid hardwood, this method involves nailing planks directly to a wooden subfloor. It provides a stable and long-lasting result.
Glue-Down Installation
Often used for engineered wood, this method involves applying adhesive to secure the planks to the subfloor. It works well on concrete surfaces.
Floating Installation
In this method, planks are not attached to the subfloor but instead click together and “float” above it. This is a popular choice for DIY projects due to its simplicity.
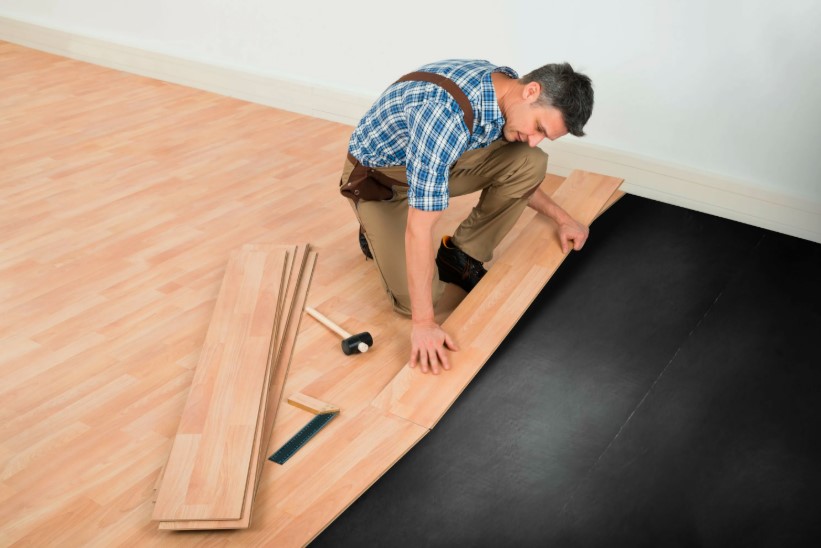
Step-by-Step Installation Process
- Prepare the Subfloor – Clean and level the surface.
- Lay Underlayment – This helps with moisture control and sound insulation.
- Plan the Layout – Start from the longest wall and ensure straight alignment.
- Install the First Row – Leave a small expansion gap near the walls.
- Continue Laying Planks – Stagger joints for a natural look and better stability.
- Cut and Fit Final Pieces – Use a saw for precise cuts around edges.
- Install Trim and Molding – Cover expansion gaps for a finished appearance.
Common Mistakes to Avoid
Many issues in wood floor installation arise from avoidable mistakes. Skipping acclimation, ignoring subfloor imperfections, or failing to leave expansion gaps can lead to warping, buckling, or uneven surfaces.
Using the wrong tools or low-quality materials can also compromise the final result. If you’re unsure about any step, consulting a professional installer is often a worthwhile investment.
Maintenance Tips
Once your Carpet installation service is complete, proper care will keep it looking new:
- Sweep or vacuum regularly to remove dirt and debris
- Use a damp (not wet) mop for cleaning
- Avoid harsh chemicals that can damage the finish
- Place mats at entryways to reduce wear
- Use furniture pads to prevent scratches
Refinishing may be required after several years, depending on usage and wear.
FAQs
1. How long does wood floor installation take?
The time depends on the size of the space and the type of flooring. On average, it can take 1–3 days for a standard room.
2. Can I install wood flooring myself?
Yes, especially with floating or laminate options. However, professional installation is recommended for solid hardwood for best results.
3. Is wood flooring suitable for kitchens?
It can be used in kitchens, but engineered wood is a better option due to its moisture resistance.
4. How much does wood floor installation cost?
Costs vary based on material, labor, and location, but typically range from moderate to high compared to other flooring types.
5. How do I maintain wood floors?
Regular cleaning, avoiding excess moisture, and periodic refinishing will keep your floors in excellent condition.
Conclusion
Wood floor installation is a valuable investment that enhances both the aesthetics and functionality of your space. By choosing the right type of wood, preparing properly, and following correct installation techniques, you can achieve a durable and visually appealing floor that lasts for years. Whether you take the DIY route or hire professionals, understanding the process ensures better results and long-term satisfaction.