Custom sew-in labels for clothing are small yet essential design elements that add professionalism, brand identity, and useful information to garments. For many designers and brand owners the process of conceptualizing, designing, and ordering labels can feel overwhelming. However when broken down into steps, the process becomes structured and intuitive. This guide walks you through every stage of creating custom sew-in labels for clothing — from concept to delivery so you can achieve a polished and meaningful result without confusion.
Whether you are launching a new apparel line or updating existing garments, following a structured workflow ensures that your labels communicate your message clearly, look great on fabric, and meet practical needs like comfort and longevity.
Step 1 Understanding the Purpose of Your Label
Before you start sketching designs or selecting materials, ask yourself why you need custom sew-in labels for clothing. Are you trying to communicate brand identity, include washing instructions, indicate size, or provide all three? Labels can carry a mix of information, but knowing the primary goal helps streamline design choices.
For example if branding is the main focus you might emphasize your logo and brand colors. If functional information is important you may need to balance branding with size and care instruction details. Understanding purpose informs every subsequent design and production decision.
Step 2 Gathering Inspiration and References
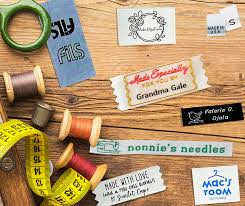
Next gather inspiration from a range of label styles and garment types. Look at how established brands use sew-in labels. Notice the placement, font choices, color contrasts, material types, and additional care instructions. Pay attention to what feels readable and what contributes to a premium look.
Create a mood board or inspiration board that shows the elements you like. You might find certain typography choices appealing, or prefer a subtle label aesthetic over bold branding. The goal is to identify visual themes that align with your brand’s personality and use them as creative reference points.
Step 3 Designing Your Label Concept
With a clear sense of purpose and inspiration in hand, it’s time to design your label concept. This is where your visual ideas begin to take shape. If you have design skills or access to a graphic designer, start by drafting preliminary artwork. Focus on readability, simplicity, and visual balance.
Keep in mind that labels are typically small, so intricate details may not translate well when stitched or woven. Bold shapes, high contrast color choices, and clean lettering are more effective. Arrange your design so the brand name or logo stands out, followed by size or care details if needed. Test multiple iterations to see what feels most cohesive.
Step 4 Choosing Materials and Fabric
Selecting the right material for custom sew-in labels for clothing is a pivotal step. The material affects not just appearance but also comfort and durability. Common options include satin, woven fabric, cotton, and polyester blends. Satin labels feel soft against the skin and create a sleek finish. Woven labels allow fine detailing and sharp edges. Cotton labels have a natural feel while polyester blends offer strength and resilience.
Consider the garment type when choosing materials. Soft fabrics like tees benefit from gentle materials like satin or cotton, while rugged garments such as jackets might suit woven or polyester blends that withstand frequent wear.
Step 5 Selecting Fonts, Colors, and Layout
Typography and color choices are critical for clear communication. Choose fonts that remain legible when scaled down to label size. Sans serif fonts are often easier to read in embroidery or weaving. Consider your brand’s identity when choosing colors. Contrasting thread and background colors improve visibility, especially for small text such as size or care instructions.
When laying out your design, prioritize the most important elements. Brand name or logo typically goes on top or center. Secondary information like size and care instructions can be placed below or in a smaller font. Visual hierarchy helps the wearer absorb information quickly.
Step 6 Creating Proofs and Making Adjustments
Before ordering custom sew-in labels for clothing it is critical to see a proof of your design. Most professional label makers provide a digital proof that shows how the label will appear once produced. This includes thread colors, text placement, and overall proportions. Carefully review the proof and request adjustments if anything feels unclear, misaligned, or off balance.
Proof review helps avoid surprises once the labels are produced. Adjusting details at this stage whether colors, spacing, or text size ensures that the final product aligns with your intentions.
Step 7 Placing Your Order and Production
Once you approve the proof it’s time to finalize your order. Confirm the quantity of labels you need, review backing preferences if applicable, and provide any special instructions to the manufacturer. After submitting your order, production begins. Many reputable makers provide updates on production schedules and shipping timelines so you can plan accordingly.
Domestic manufacturing within the USA often results in clearer communication, faster turnaround, and more consistent quality control compared to international production.
Step 8 Attaching Labels to Garments
After receiving your custom sew-in labels for clothing you can proceed to attach them to your garments. Label attachment can be done by hand stitching, machine stitching, or by a professional production team if you are working with larger quantities. When stitching labels ensure that they lie flat, the edges do not curl, and they are placed exactly where intended for comfort and visibility.
Practice stitching on a spare fabric piece if needed to master placement and balance before working on the final garment.
Frequently Asked Questions
What should I focus on first when creating custom sew-in labels for clothing
Start by defining the label’s purpose so that your design choices align with functional and branding goals rather than random visual elements.
How do I choose materials for my sew-in labels
Choose based on garment type and wearer comfort. Satin offers smooth feel while woven material provides clear fine detail. Cotton and polyester blends add durability and strength.
Why is reviewing a digital proof important before final production
Digital proofs help you verify thread colors, layout, text placement, and overall proportions so adjustments can be made before irreversible production begins.
Conclusion
Creating and ordering custom sew-in labels for clothing requires thoughtful planning, clear design choices, and purposeful decisions at every stage. From defining your purpose and gathering inspiration to designing, proofing, and finally attaching the labels, each step adds clarity and meaning to your garments. When executed with care and intention, custom sew-in labels do more than identify size and brand — they enhance the garment’s identity, convey quality, and connect with the wearer in a subtle yet meaningful way. Approaching this process step by step helps you achieve a result that feels professional, coherent, and reflective of your creative vision.