Garlic chutney is one of those versatile condiments that instantly lifts any meal with its bold, vibrant flavor. If you’ve never made garlic chutney before or want to perfect your recipe, this step-by-step guide is designed just for you. From the pantry staples to final serving tips, this approachable recipe will have you mastering a delicious garlic chutney in no time.
What is Garlic Chutney?
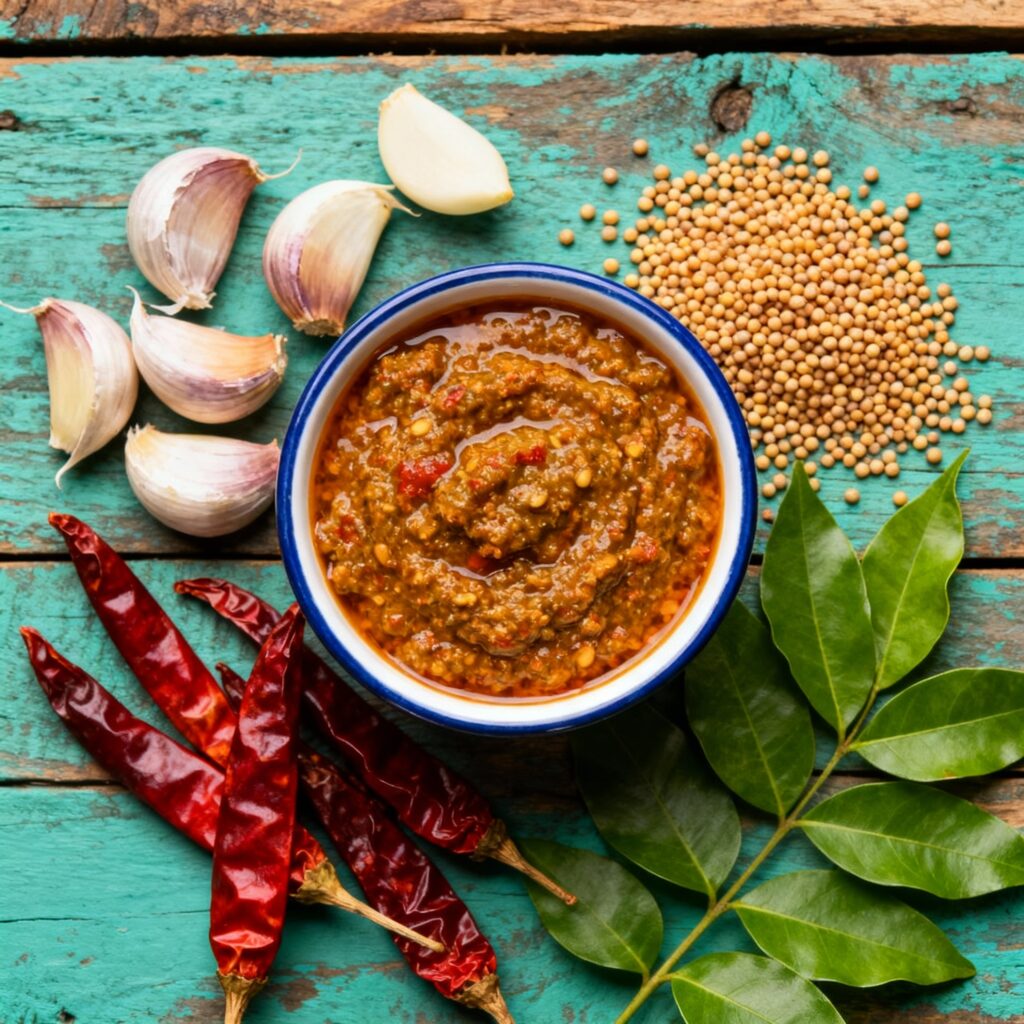
At its core, garlic chutney is a spicy, tangy blend primarily made from fresh garlic, dried red chilies, and an assortment of flavored spices. It’s a staple in many Indian homes, loved for its bold garlicky heat that can turn simple snacks, breads, and even main courses into flavorful experiences. While it sounds complex, garlic chutney is surprisingly easy to make, even for beginners.
Ingredients You’ll Need
To start, here’s a list of basic ingredients you should gather:
-
25 dried red chilies (Kashmiri or Byadagi variety preferred for balanced heat and vibrant color)
-
10 large fresh garlic cloves, peeled
-
1/2 teaspoon cumin seeds
-
1/3 teaspoon salt (to taste)
-
1½ to 2 tablespoons sugar or jaggery (to balance spice with subtle sweetness)
-
1 to 1½ tablespoons lemon juice or apple cider vinegar for tanginess
-
3 to 4 tablespoons water for blending
You can also add an optional tempering step to boost flavor and preservation:
-
1 tablespoon oil
-
1 teaspoon mustard seeds
-
A few curry leaves
-
A pinch of asafoetida (hing)
Step 1: Soften the Chilies
Dried chilies can be tough to grind without softening first. Begin by soaking them in hot water for about 15 to 20 minutes. This rehydrates the chilies, making them tender and easier to blend. Drain the water but reserve a little if you want to adjust the chutney’s consistency later.
Step 2: Blend the Ingredients
Add the softened red chilies, peeled garlic cloves, cumin seeds, salt, sugar, lemon juice, and a few tablespoons of water into a blender or mixer grinder. Blend until smooth. The texture should be spreadable but not runny; add water gradually to reach your preferred consistency.
Step 3: Adjust to Taste
Taste your chutney. If the heat is too strong, balance it with a bit more sugar or jaggery. You can also tweak salt and acidity with more lemon juice or vinegar. This stage lets you customize the chutney according to your flavor preferences, so don’t hesitate to experiment.
Step 4 (Optional): Tempering for Extra Depth
To deepen the flavor and increase the chutney’s shelf life, tempering is highly recommended:
-
Heat oil in a small pan.
-
Add mustard seeds and let them splutter.
-
Toss in curry leaves and a pinch of asafoetida.
-
Pour this hot tempering over the blended chutney and mix well.
This step adds richness and an earthy aroma that immediately enhances your garlic chutney.
Step 5: Storage and Serving
Allow the chutney to cool before transferring it to an airtight container. When tempered, it can last 3 to 4 weeks refrigerated. Untempered chutney is best consumed within a week or so. Use the chutney as a side with dosas, idlis, samosas, or spread it on sandwiches and wraps for a tasty punch.
Serving Ideas for Garlic Chutney
The magic of garlic chutney lies in its versatility:
-
Use it to spice up breakfast dishes like uttapams and parathas.
-
Add a dollop to your chaats for a fiery zest.
-
Blend into salad dressings or marinades for grilled vegetables or meats.
-
Try it as a dip for fried snacks like pakoras and bhajis.
The options are endless, and garlic chutney often becomes a beloved pantry staple once you start making it at home.
Tips for the Perfect Garlic Chutney
-
Always use fresh garlic cloves; older or sprouting garlic may impart bitterness.
-
For a milder variation, deseed the dried red chilies before soaking and blending.
-
Add roasted peanuts or grated coconut for texture richness and a nutty twist.
-
Substitute lemon juice with tamarind for a tangier chutney flavor.
Why Make Garlic Chutney at Home?
Besides the unmatched freshness and ability to control flavor, homemade garlic chutney is free from preservatives and artificial additives that store-bought versions often contain. Plus, it’s a budget-friendly way to elevate everyday meals with minimal effort.
Final Thoughts
Learning to make garlic chutney opens up a world of flavorful possibilities in your kitchen. The steps are straightforward, and once mastered, you can customize and experiment endlessly. Whether you’re a beginner or an experienced cook, this step-by-step guide ensures your garlic chutney will turn out perfectly every time—spicy, tangy, and packed with bold flavor.
Enjoy the process and celebrate the magic a simple condiment can bring to your meals!