Replacing a uPVC door handle might sound like a daunting task to many homeowners, but with the right guidance and tools, it can be a straightforward and rewarding DIY project. Whether your door handle is worn out, broken, or simply outdated, changing it can enhance both the security and aesthetics of your home. This guide will walk you through the process step by step, making the replacement of uPVC door handles easier than you ever imagined.
Understanding uPVC Door Handles
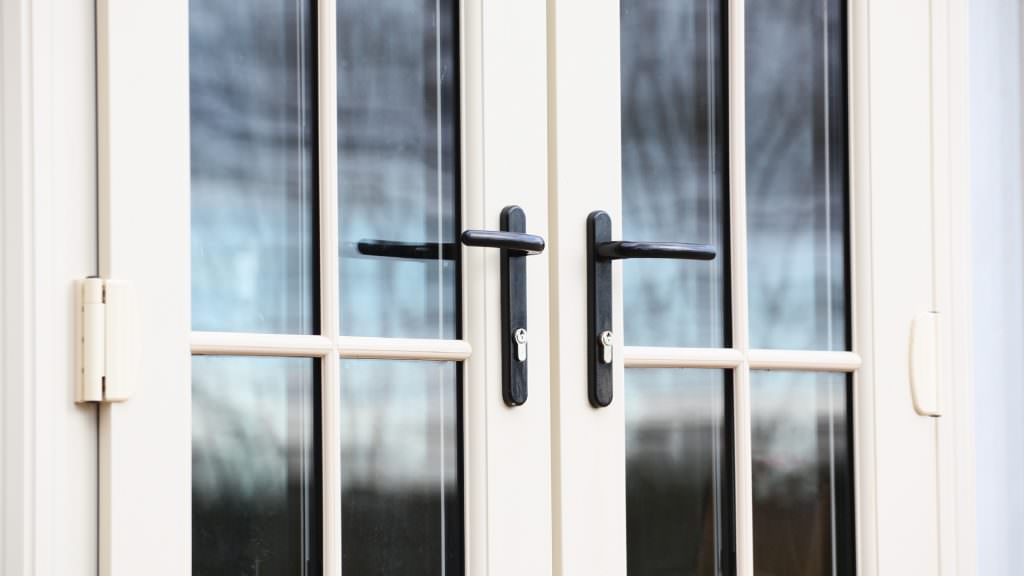
uPVC (unplasticized polyvinyl chloride) doors have become increasingly popular due to their durability, low maintenance, and energy efficiency. The door handle, while a small component, plays a crucial role in the functionality and security of the door. uPVC handles often come with integrated locks or latch mechanisms and can be lever or knob-style.
Before you start, it’s essential to identify the type of handle your door uses. Handles can be either:
Spindle Handles: These connect through a square spindle that turns the latch inside the door.
Multipoint Lock Handles: Common on modern doors, these connect to a multipoint locking system that secures the door at multiple points.
Knowing your handle type ensures you purchase the correct replacement and understand the mechanics involved.
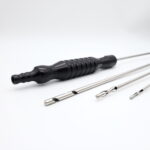
Tools You’ll Need
Replacing a uPVC door handle doesn’t require a professional toolkit. Most homeowners will need the following basic tools:
- A screwdriver (usually a Phillips or flathead, depending on your handle)
- A replacement uPVC handle (make sure it matches your door’s specifications)
- Measuring tape or ruler
- Allen key (if your handle uses hex screws)
- Lubricant (optional, for easing stiff mechanisms)
- Clean cloth (for wiping down the door and handle)
Having the right tools ready before starting can prevent frustration and mistakes.
Step 1: Remove the Old Handle
Start by opening the door and locating the screws that secure the handle. On most uPVC doors, screws are hidden under plastic covers or caps to improve aesthetics. Carefully pry off these covers with a flathead screwdriver to reveal the screws.
Once the screws are visible, use the appropriate screwdriver or Allen key to remove them. Hold onto the handle as you remove the screws to prevent it from falling and potentially causing damage. After the screws are removed, gently pull the handle away from the door. If your handle is attached to a multipoint lock, you may need to lift or turn the handle slightly to disengage it.
Take note of any small components such as washers or spindle pieces, as these will need to be reinstalled with the new handle.
Step 2: Inspect the Mechanism
With the old handle removed, it’s a good idea to inspect the door mechanism. Look for signs of wear or damage, such as bent spindles, worn-out latches, or rusted components. Cleaning the mechanism and applying a small amount of lubricant can improve the longevity of the new handle. If any internal components are damaged, it’s wise to replace them before installing the new handle.
Step 3: Choose the Right Replacement Handle
Selecting the correct replacement handle is crucial. Take the old handle with you when shopping to ensure you match the screw spacing, handle length, and lock type. Most uPVC door handles are available in standard sizes, but variations exist depending on the manufacturer and door model.
When choosing a replacement, consider not only functionality but also style. Handles come in various finishes such as white, black, gold, or chrome, allowing you to complement your home’s décor.
Step 4: Install the New Handle
Begin by aligning the spindle or latch mechanism with the corresponding hole in the door. Insert the spindle through the latch, ensuring it fits snugly. Place the new handle onto the spindle, making sure it sits flush against the door surface.
Secure the handle by tightening the screws through the mounting holes. Avoid overtightening, as this can crack the uPVC material. If your handle has a plastic cover, snap it back into place to conceal the screws.
If your handle operates a multipoint lock, test the mechanism by lifting and turning the handle to ensure all locking points engage correctly. Adjust the alignment if necessary. Some multipoint locks have adjustable striker plates or keeps, which can be tweaked for smooth operation.
Step 5: Test the Handle
Once installed, test the handle multiple times. Ensure that the door opens and closes smoothly, the latch engages properly, and the handle returns to its resting position after use. Check that any locking mechanisms operate correctly with the key, if applicable. Testing is essential to avoid any security or functional issues.
If you notice resistance, loosen the screws slightly and readjust the handle. Proper alignment is key to ensuring long-term performance and avoiding premature wear.
Tips for a Successful DIY Replacement
Take Your Time: Rushing the process can lead to stripped screws, misaligned handles, or damage to the door.
Keep Spare Parts: Some handles come with extra screws or covers. Keep these handy in case you need replacements.
Label Components: If your handle has multiple parts, label them before removal to make reassembly easier.
Consider Professional Help: If your door has a complicated multipoint lock or if the old handle is stuck, a professional locksmith can ensure safe installation.
Lubrication: A small amount of silicone spray or graphite lubricant on the latch mechanism can make the handle smoother to operate. Avoid oil-based lubricants that can attract dust.
Common Challenges and How to Avoid Them
Misaligned Handles: Ensure the spindle is straight and the screws are evenly tightened. Misalignment can prevent the latch from fully engaging.
Stripped Screws: Use the correct screwdriver size and type. If a screw is stuck, apply a drop of penetrating oil and gently work it loose.
Handle Looseness: Loose handles can damage the door over time. Always tighten screws firmly but carefully.
Benefits of Replacing Your uPVC Handle Yourself
Cost Savings: DIY replacement is far cheaper than hiring a professional, often costing just the price of the handle.
Immediate Results: No waiting for appointments—replacement can be done in under an hour.
Personal Satisfaction: Completing a home improvement task yourself is empowering and builds confidence.
Customization: You can choose a handle that better matches your home’s décor and your personal style.
Conclusion
Replacing a uPVC door handle is a manageable DIY task that can significantly improve the functionality, security, and appearance of your door. By understanding the type of handle, preparing the right tools, and carefully following the steps outlined, homeowners can accomplish this task quickly and efficiently.
Always take your time, double-check alignment, and test the handle after installation to ensure smooth operation. With a little patience and attention to detail, you’ll have a new, fully functional door handle that enhances both the security and style of your home.