Installing a window air conditioner is a practical way to keep your home cool without investing in a central cooling system. Proper window AC installation ensures efficient performance, lower energy bills, and a longer lifespan for your unit. Whether you’re a homeowner planning a DIY setup or considering professional help, understanding the process and best practices is essential. This guide walks you through everything you need to know about window AC installation.
Why Proper Window AC Installation Matters
Correct installation plays a major role in how effectively your air conditioner cools your space. A poorly installed unit can cause air leaks, inefficient cooling, water leakage, and even safety hazards. When installed properly, your AC unit works efficiently, consumes less electricity, and keeps your room comfortable throughout the summer months.
Choosing the Right Window AC Unit
Before starting the installation, it’s important to select the right AC size for your room. An undersized unit won’t cool effectively, while an oversized one may cool too quickly without properly dehumidifying the air.
Consider these factors:
-
Room size (square footage)
-
Window dimensions
-
Energy efficiency rating (EER or Energy Star)
-
Cooling capacity (BTUs)
Tools and Materials Needed
To ensure smooth window AC installation, gather the following tools:
-
Measuring tape
-
Screwdriver
-
Level
-
Support brackets (if required)
-
Foam insulation or weather stripping
-
Mounting screws
Having these items ready will save time and make the process safer.
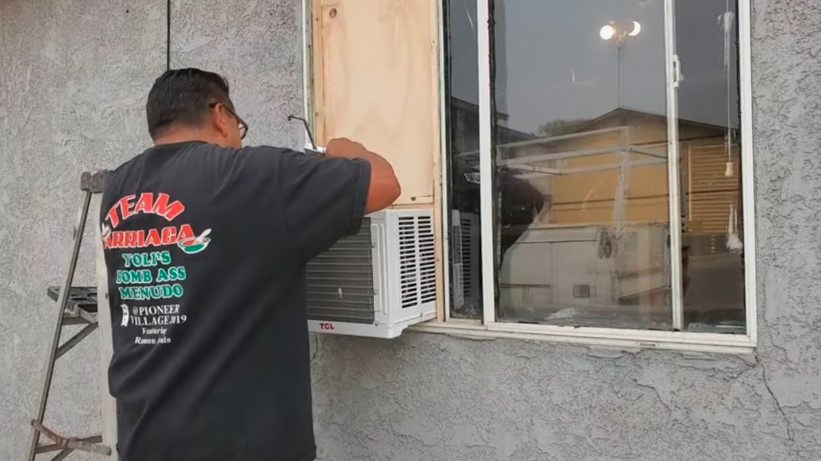
Step-by-Step Window AC Installation Process
1. Measure Your Window
Check the width and height of your window to ensure your AC unit fits properly. Most window ACs are adjustable, but it’s best to confirm before installation.
2. Prepare the Window
Open the window and clean the sill area. Remove any obstacles that might interfere with the installation. Attach the side panels (accordion curtains) to the unit as per the manufacturer’s instructions.
3. Install Support Brackets
Some units require external support brackets to bear weight. This adds stability and prevents the AC from tilting outward.
4. Place the AC Unit
Carefully lift and position the AC into the window opening. Ensure it sits evenly on the sill and slightly tilts outward for proper water drainage.
5. Secure the Unit
Lower the window sash to hold the AC in place. Use screws to secure the unit to the window frame as recommended.
6. Seal the Gaps
Use foam strips or weather sealing tape to fill gaps around the unit. This prevents warm air from entering and improves energy efficiency.
7. Test the AC
Plug in the unit and turn it on to ensure it’s functioning properly. Check for unusual noise, vibration, or air leaks.
Safety Tips for Window AC Installation
-
Always have a helper when lifting heavy units
-
Wear protective gloves
-
Ensure electrical outlets can handle the AC’s power requirements
-
Avoid over-tightening screws to prevent damage
Benefits of Professional Installation
While DIY installation is possible, hiring professionals ensures:
-
Proper fitting and alignment
-
Reduced risk of damage
-
Optimal performance
-
Warranty protection
Professional window AC installation is especially recommended for heavy units or higher floors.
Common Mistakes to Avoid
-
Installing the wrong AC size
-
Skipping insulation around gaps
-
Incorrect tilt angle
-
Blocking airflow with curtains or furniture
Avoiding these mistakes helps your AC work efficiently and last longer.
Maintenance Tips After Installation
-
Clean filters every 2–4 weeks
-
Check seals regularly
-
Inspect drainage
-
Schedule annual servicing
Proper maintenance keeps your AC running smoothly and improves indoor air quality.
Frequently Asked Questions (FAQs)
1. Can I install a window AC myself?
Yes, most window AC units are designed for DIY installation. However, heavy units or complex windows may require professional assistance.
2. How long does window AC installation take?
Typically, installation takes 30 to 60 minutes, depending on experience and window type.
3. Does a window AC need special wiring?
Standard units plug into regular outlets. High-capacity models may need dedicated circuits.
4. Why should the AC tilt slightly outward?
This allows condensation to drain outside instead of into your room.
5. How often should I service my window AC?
Basic cleaning should be done monthly, while professional servicing is recommended once a year.
6. Is professional installation expensive?
Costs vary, but it’s generally affordable and ensures proper setup and safety.
Conclusion
Ductless AC Service is a simple yet crucial process that significantly impacts cooling efficiency and comfort. By choosing the right unit, following proper installation steps, and maintaining it regularly, you can enjoy reliable cooling throughout the summer. While DIY installation is feasible, professional assistance offers added safety and optimal performance. A well-installed window AC not only keeps your room cool but also helps you save energy and extend the life of your appliance. Whether you install it yourself or hire a technician, following best practices ensures a comfortable and hassle-free experience.